My new apartment came with “free internet,” a phrase that can mean anything from pleasant surprise to the router is now your landlord. In this case the line was stable—roughly 100 Mbps with a 5 ms ping—but the network still had two awkward properties: every new device met a captive portal, and the building shared one public IP address.
I wanted machines without browsers, including Raspberry Pis and VMs, to get online without a ceremonial login. I also wanted their traffic encrypted across infrastructure I did not control. The answer was a Raspberry Pi router with a permanent WireGuard tunnel back to my family home.
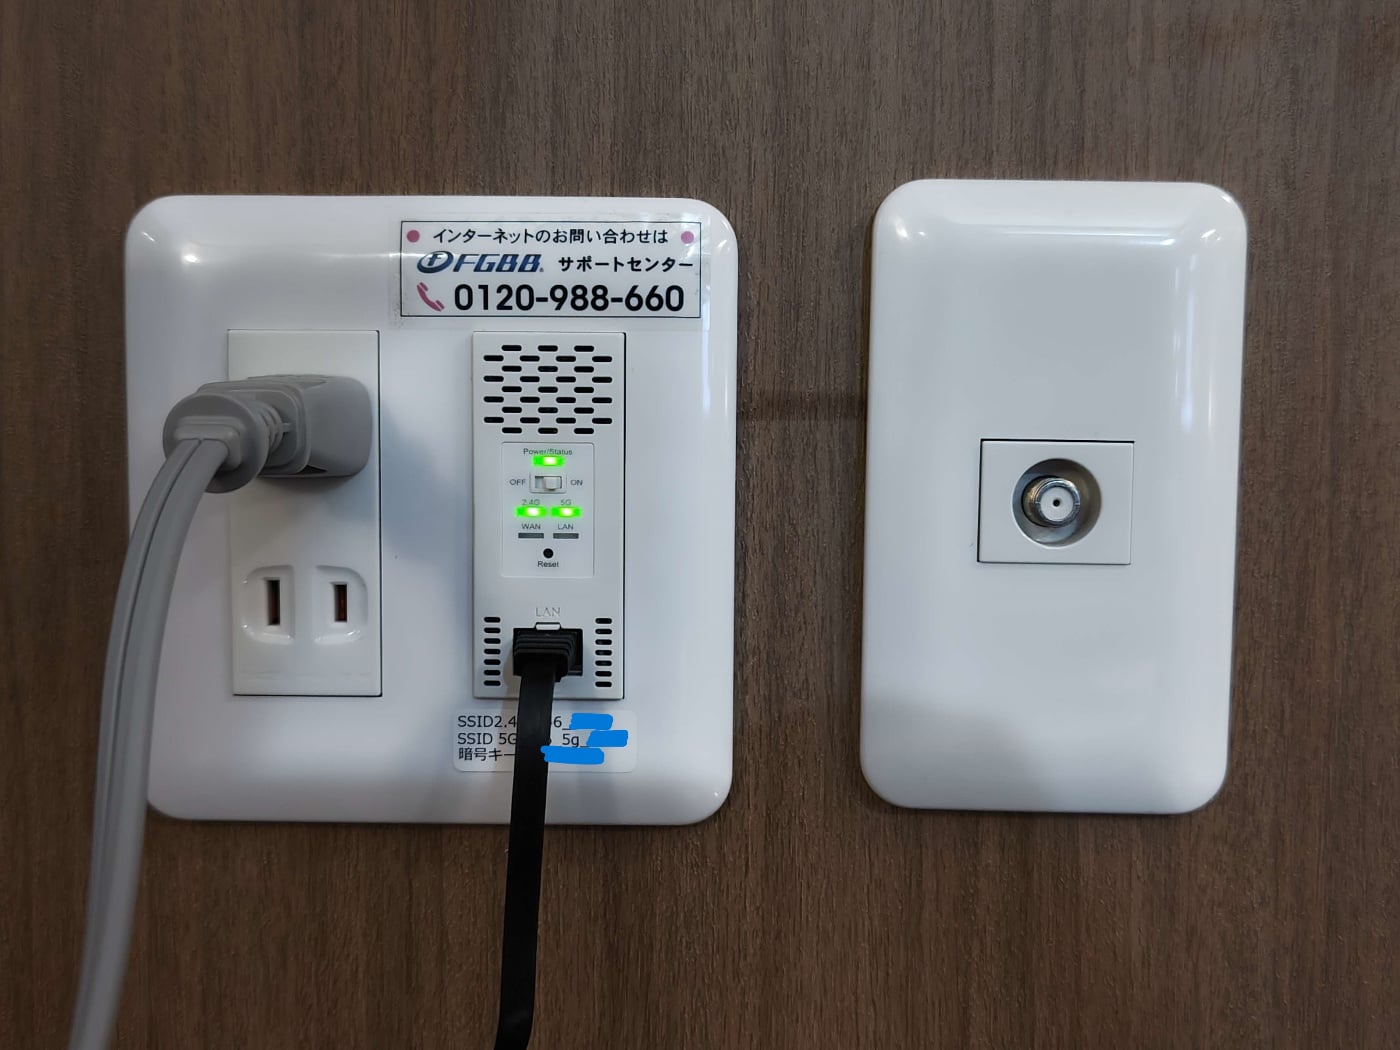
What the apartment network was doing #
Fiber reached the building, then Ethernet ran from the shared equipment to each apartment. A wall-mounted Wi-Fi router provided the last hop. Because the whole building shared a public address, inbound ports and a dedicated global address were unavailable. Tunneling can work around that; the more immediate nuisance was authentication.
Every device had to visit a captive portal and sign in before it could reach the WAN. Fine for a phone. Less charming for a headless VM. The alternatives were to proxy a browser through the machine or ask the operator to whitelist its MAC address—which is especially silly for disposable VMs whose MAC addresses change routinely.
The security model was acceptable for ordinary use: most traffic is HTTPS and client isolation should prevent tenants talking to one another. Still, anyone with access to the shared Ethernet equipment occupies a privileged position, and the router credentials were printed inside the room. I preferred to own the trust boundary.
Put the boundary on a Raspberry Pi #
I used a Raspberry Pi 4 and a USB Ethernet adapter. A router needs at least two interfaces: one facing the apartment network and one facing my devices. The Pi’s built-in port alone was therefore one port short of a party.
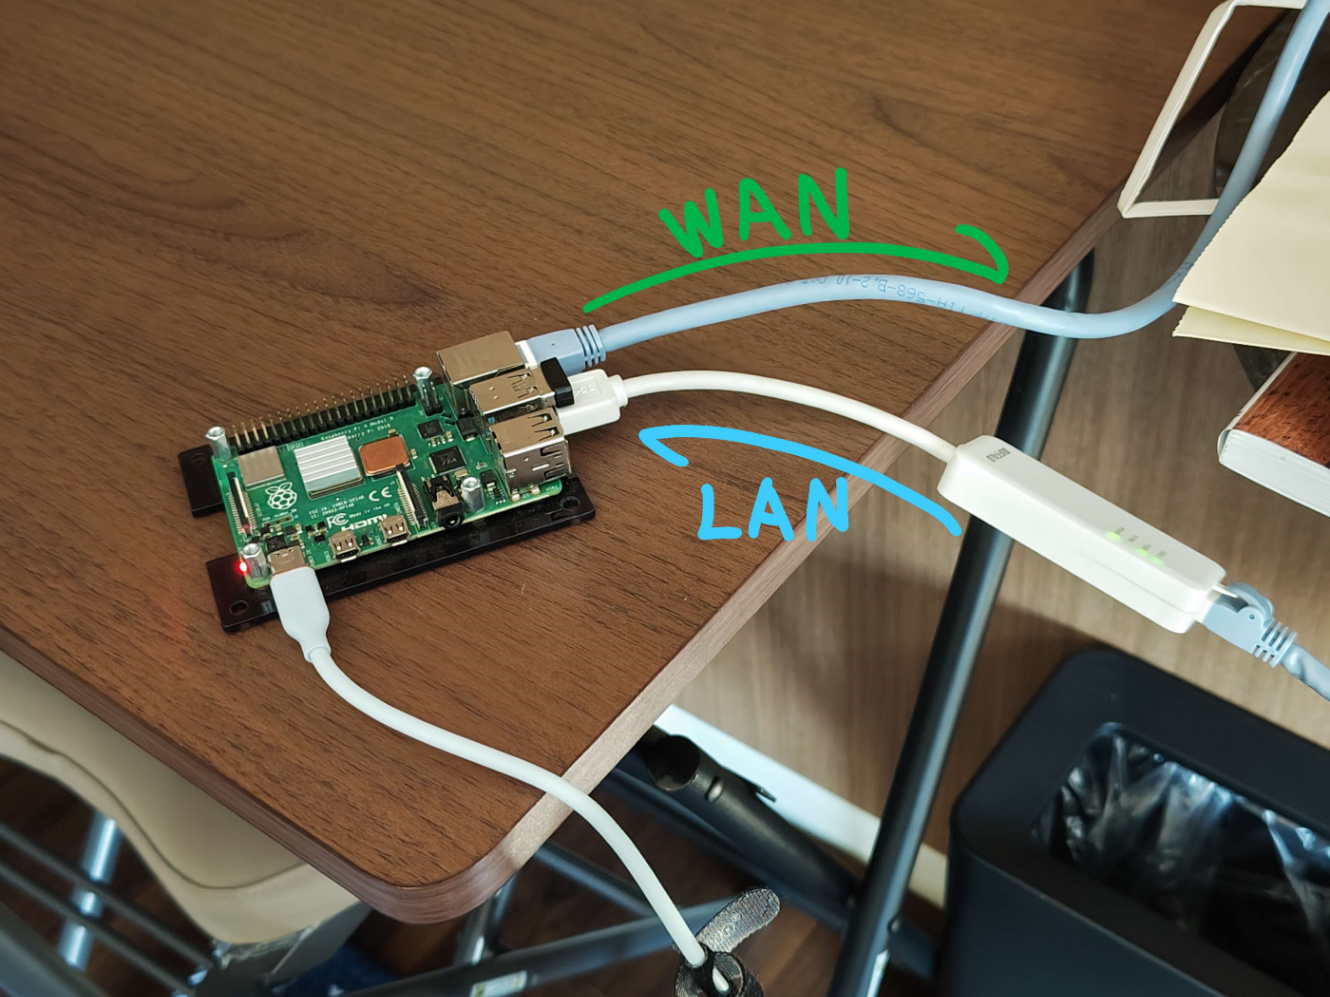
Ubuntu was the pragmatic OS choice. OpenWrt is excellent if you want a router-style web UI; here I wanted familiar Linux tools. I assigned 192.168.185.0/24 to the LAN side and 192.168.185.1 to the Pi:
enx7403bd7f2042: # USB Ethernet, LAN side
  dhcp4: no
  addresses:
    - 192.168.185.1/24
  nameservers:
    addresses: [1.1.1.1]
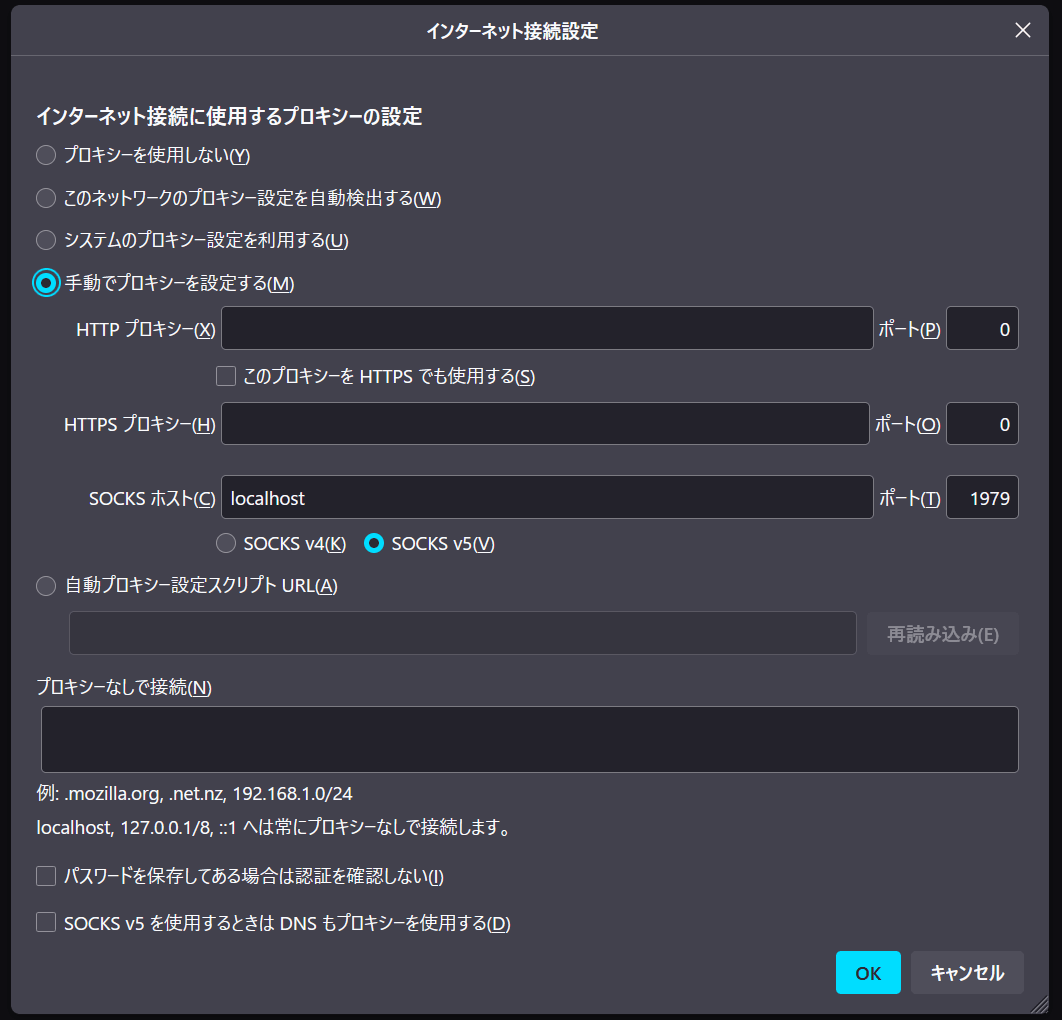
The WAN side received an address over DHCP. To satisfy the captive portal once, I opened a SOCKS proxy from my laptop through the Pi:
ssh -D 1070 [email protected]Pointing the browser’s SOCKS v5 setting at localhost:1070 made the portal see traffic from the Pi. One login later, the router was online.
Route everything through WireGuard #
WireGuard exposed wg0. Masquerading and forwarding moved LAN traffic into it:
sudo iptables -t nat -A POSTROUTING -o wg0 -j MASQUERADE
sudo iptables -A FORWARD -i enx7403bd7f2042 -o wg0 -j ACCEPT
Enable net.ipv4.ip_forward=1 in /etc/sysctl.conf, then apply it with sudo sysctl -p. I first persisted the rules with iptables-persistent, but later moved them into WireGuard’s PostUp and PostDown hooks. That makes the behavior explicit: when the tunnel is up, route through wg0; when it is down, restore the normal WAN route. State coupled to the lifecycle that owns it is generally less haunted.
Give clients addresses automatically #
Static addresses proved the path worked, but assigning them by hand is not a hobby I recommend. ISC DHCP reached end of maintenance in 2022, so I used Kea:
{
  "Dhcp4": {
    "interfaces-config": { "interfaces": ["enx7403bd7f2042"] },
    "subnet4": [
      {
        "subnet": "192.168.185.0/24",
        "pools": [{ "pool": "192.168.185.100 - 192.168.185.200" }],
        "option-data": [
          { "name": "domain-name-servers", "data": "1.1.1.1, 1.0.0.1" },
          { "name": "routers", "data": "192.168.185.1" }
        ]
      }
    ]
  }
}
I used a separate Wi-Fi access point in bridge mode rather than making the Pi carry that load too.
Performance, and the MTU-shaped pothole #
Without WireGuard the connection measured 242 Mbps down, 320 Mbps up, and 5 ms latency.
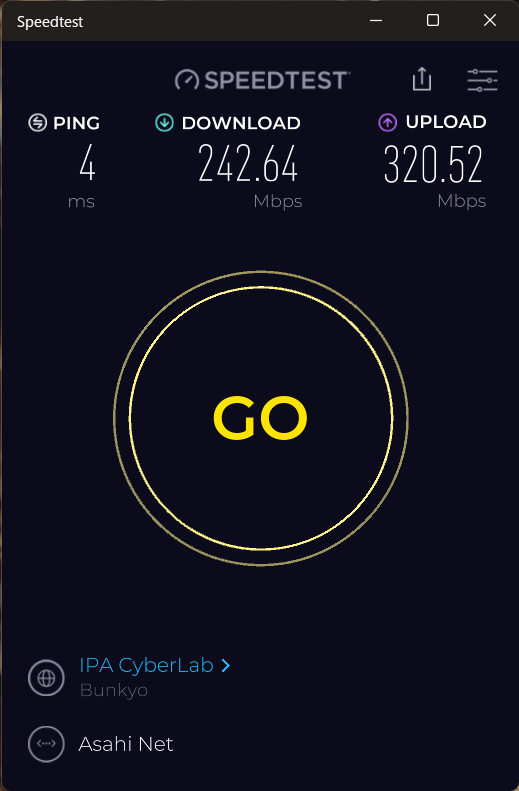
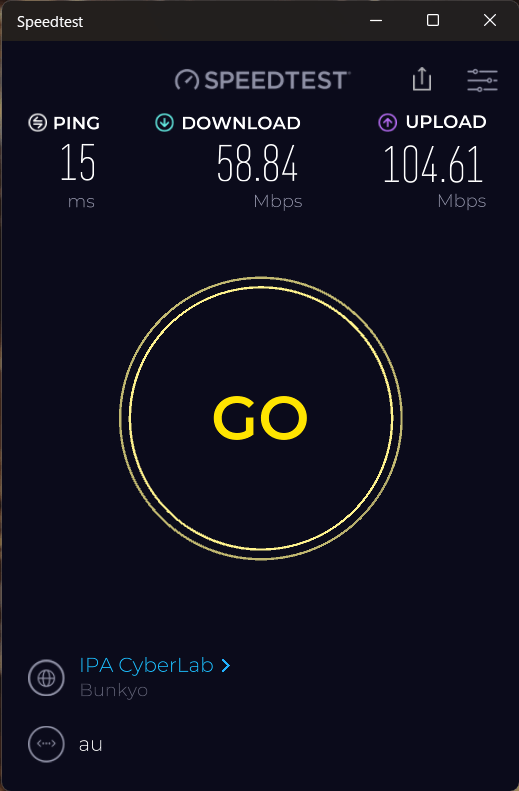
Through the tunnel it fell to 58 Mbps down, 104 Mbps up, and 15 ms latency. The drop is real; tuning and the remote endpoint both matter. For this use case, predictable encrypted connectivity mattered more than winning a benchmark screenshot.
Some sites also stalled, Netflix became glacial, certain CDN images vanished, and IMAP misbehaved. Those symptoms pointed to packet loss caused by an unsuitable MTU. Setting WireGuard’s MTU to 1400 fixed them.
The finished box makes any attached device behave as though it were on my home network—without installing WireGuard or negotiating the captive portal on every toaster. More usefully, the same Pi can travel. Plug it into another network and the trusted side of the setup comes with it.